This guide explains how to configure the AI Chatbot’s behavior, activation conditions, and appearance before launching it on your storefront.
Settings Overview #
The Settings tab allows you to customize how your AI Chatbot appears and interacts with customers. Below are the key sections you can configure:
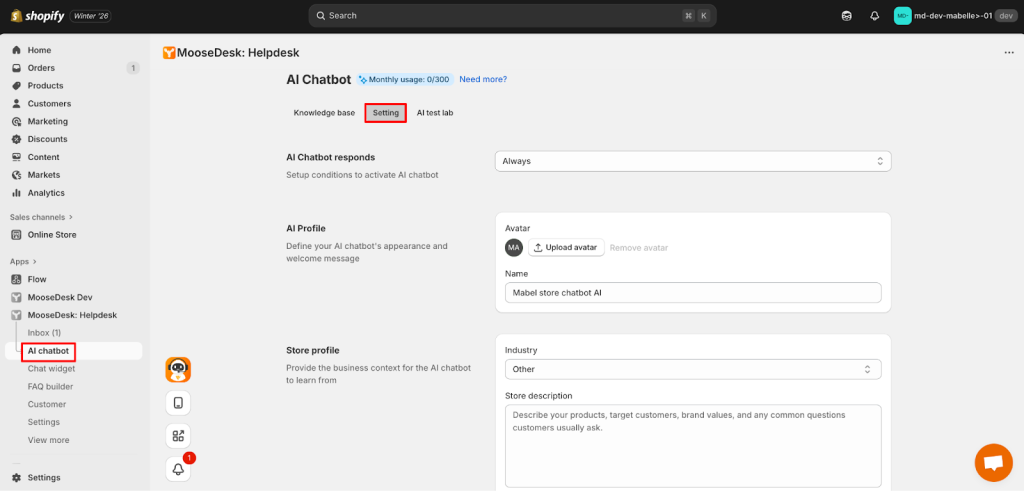
AI responses #
Define when the AI Chatbot should be activated.
- Always: The chatbot is always active.
- Outside business hours: Only active when your support team is offline.

AI Profile #
Customize the chatbot’s appearance and personality:
- Avatar: Upload an image to represent your chatbot.
- Name: Set the display name (e.g., MooseDesk Support Bot).

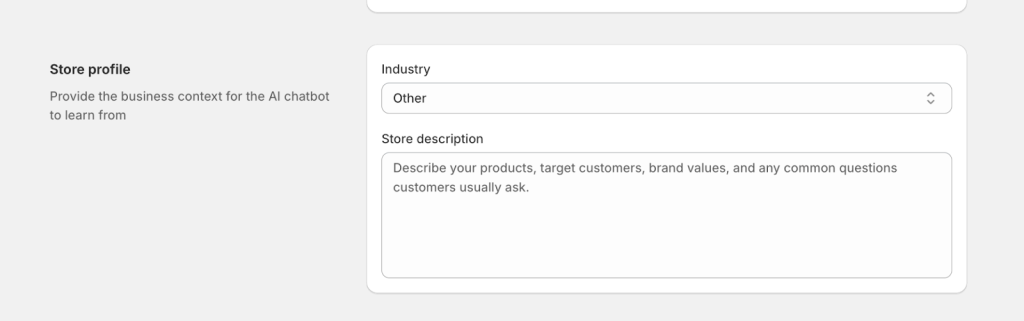
Store Profile #
Users can now input Store Description + select Industry to understand business context better
Industry: Choose the specific industry that your store
Store description: Set the description for product or brand values (e.g.,).
Handover conditions #
On this screen, there will be two options for you with the handover conditions here.
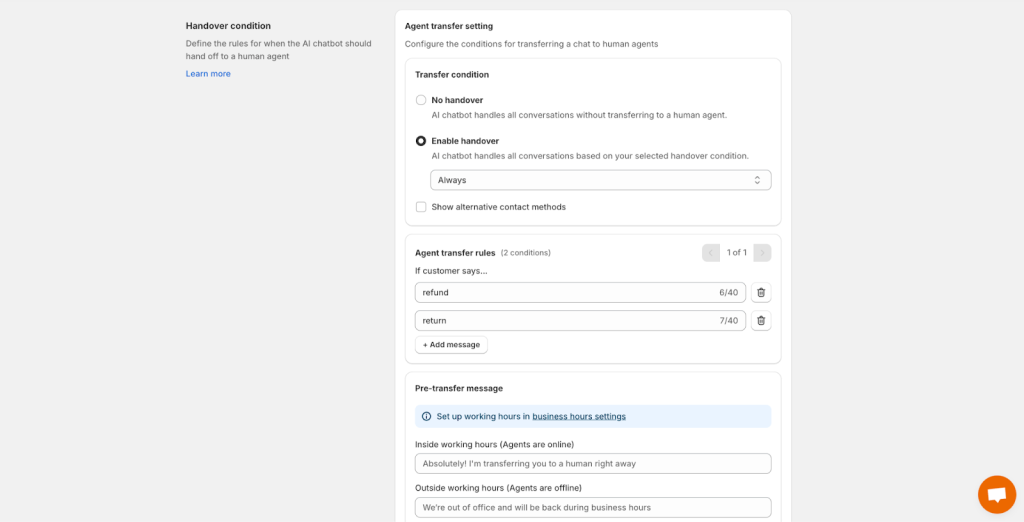
No handover: AI chatbot handles all conversations without transferring to a human agent.
Enable handover: AI chatbot handles all conversations based on your selected handover condition.
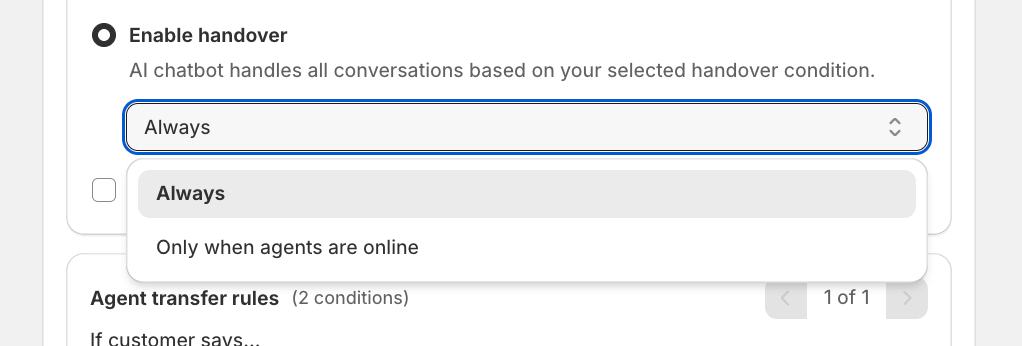
Set the chatbot activation condition to Always or Only when agents are online, depending on when you want the chatbot to be available.
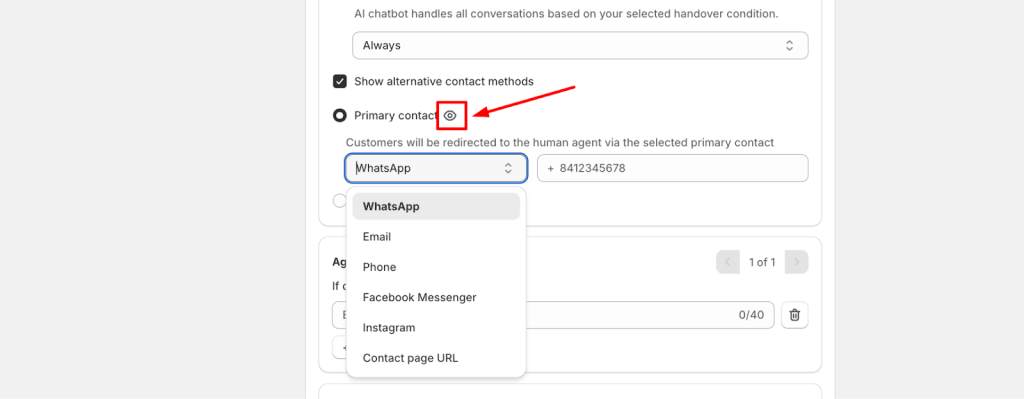
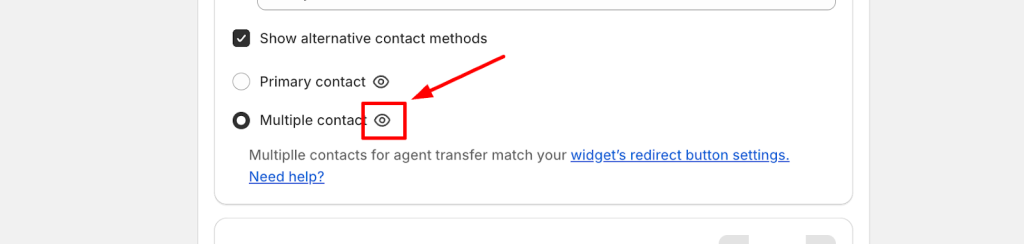
Alternative contact methods #
For the alternative contact methods, you can consider using two methods of contact:
Primary contact: by adding your own contact number from multiple channels to redirect customers to the human agent.
Note: To preview how each contact method will appear to customers, hover your mouse over the eye icon located on the left side of each contact method.

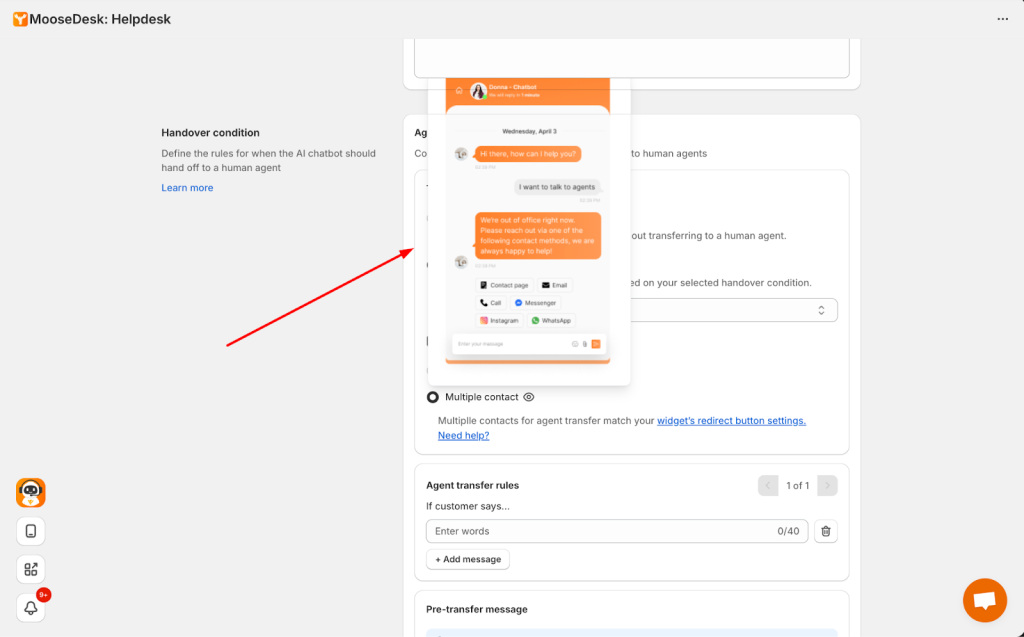
Multiple contact: please configure the Redirect Button in the Chat Widget settings and add your contact details for the supported channels accordingly.
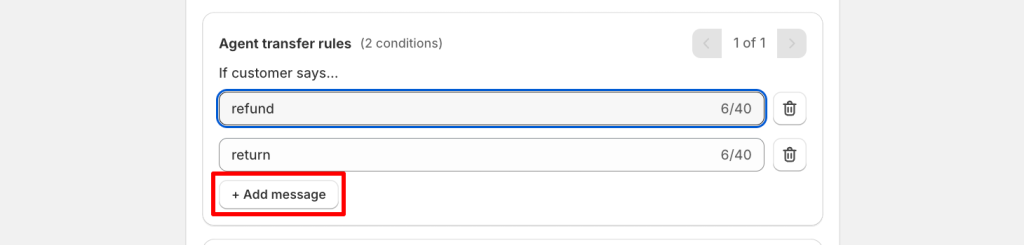
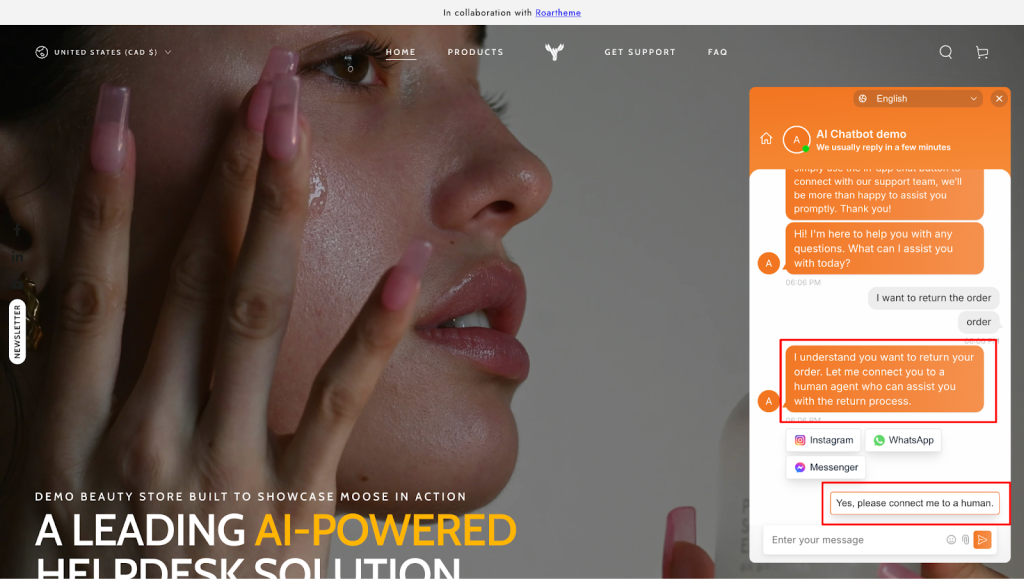
Agent transfer rules #
With the agent transfer rules, you can add the rule of transfer by clicking on “Add message” with keywords such as “Refund” or “Return”.
For more information of how to set up redirect button, please check on this guide doc: 👉How to set up redirect button within Moosedesk widget
This will automatically transfer the current conversation back to an agent, allowing them to continue handling the ticket.
Note: Don’t forget to click Save to save all your settings.
After setting up the transfer rules, conversations will automatically be passed to a human agent when needed. Below is an example of how this handoff appears on your storefront.
Pre-transfer message #
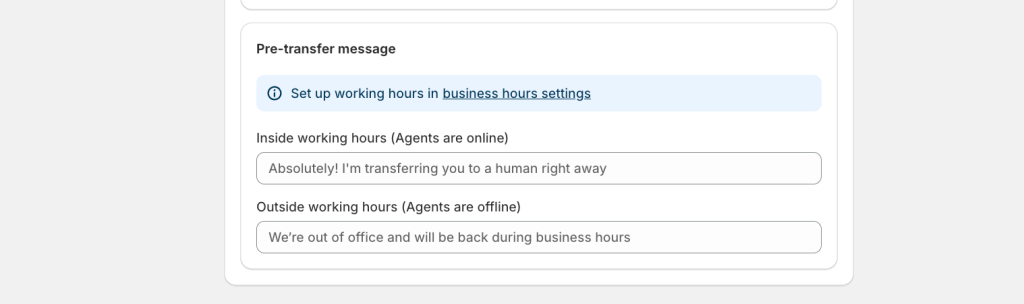
With pre-transfer message, please check on these following steps:
Step 1: Set up your working hours in the Business Hours settings.
Step 2: Add your custom transfer message for both within and outside working hours to notify customers before the conversation is transferred back to an agent.
For example: “Thank you for letting us know. Please hold our agents will join in this chat right now”
Support Channels #
If you ever need assistance, our Help Center is packed with comprehensive guides and tutorials.
At MooseDesk, we’re always here to help. Our dedicated email and live chat teams are available around the clock. Drop us an email at help@moosedesk.com, or click the Live Chat icon located at the bottom left corner of the MooseDesk app, our official website, and even within this Help Center.